
File Output from Coyote Graphics Commands
QUESTION: I've heard that Coyote Graphics commands can automatically produce PostScript, encapsulated PostScript, BMP, GIF, JPEG, PNG, and TIFF file output. Is this true?
![]()
ANSWER: Yes, it is true. You can automatically create this kind of output simply by using the Output keyword on any Coyote Graphics command. Plus, it is trivial to add this functionality to your own Coyote Graphics programs. You can see over 50 different kinds of graphics plots that can be sent directly to a PostScript file in the Coyote Plot Gallery.
If you wish to be prompted for the name of the output file, you can specify the type of file you want to create with the Output keyword. Any of these file types are allowed.
- PS -- PostScript file
- EPS -- Encapsulated PostScript file
- PDF -- PDF file
- BMP -- BMP raster file
- GIF -- GIF raster file
- JPEG -- JPEG raster file
- PNG -- PNG raster file
- TIFF -- TIFF raster file
For example, to create a PNG file of a plot command, and be prompted for the name of the output file, you can type a command like this.
cgPlot, cgDemoData(1), Output='PNG'
If you do not wish to be prompted for an output file name, you can just pass the filename to the Output keyword directly. For example, to send the same line plot to a file named "test.png" without a user prompt, you would type this:
cgPlot, cgDemoData(1), Output='test.png'
The type of file will be created based on the file name extension ("png", in this example).
The output files, with the exception of the two types of PostScript output, are created from PostScript intermediate files, to enable high resolution graphical and font output. This means you must have Ghostscript and ImageMagick installed properly on your machine. Once the output raster file is created, the intermediate PostScript file is deleted.
![]()
Saving Multiple Coyote Graphics Commands
Saving graphical output to a PostScript, PDF, or raster file can also be done from within cgWindow. In fact, this is often the easiest way to save the output from multiple Coyote Graphics commands. For example, suppose you wanted to output a filled contour plot to a PNG file, but you also wanted to include a color bar with the plot, you might do it either programmatically, as with the code below, or by selecting the PNG File option from the Save As pull-done menu on the graphics window.
  cgLoadCT, 33, NColors=8, Bottom=1
  data = cgDemoData(2)
  levels = cgConLevels(data, NLEVELS=8)
  cgContour, data, Levels=levels, $
    C_Colors=Indgen(8)+1, /Fill, /Outline, $
    Position=[0.1, 0.1, 0.9, 0.825], /Window
  cgColorbar, NColors=7, Bottom=1, OOB_High=8B, $
    /Discrete, Range=[Min(levels), Max(levels)], /AddCmd
  cgControl, Output='filledplot.png', IM_Width=600
Another way of creating the same PNG file, but without using the cgWindow graphics window, would be to create the PostScript file yourself. The commands would look like this.
  cgLoadCT, 33, NColors=8, Bottom=1
  data = cgDemoData(2)
  levels = cgConLevels(data, NLEVELS=8)
  cgPS_Open, 'filledplot.ps'
  cgContour, data, Levels=levels, $
    C_Colors=Indgen(8)+1, /Fill, /Outline, $
    Position=[0.1, 0.1, 0.9, 0.825]
  cgColorbar, NColors=7, Bottom=1, OOB_High=8B, $
    /Discrete, Range=[Min(levels), Max(levels)]
  cgPS_Close, /PNG, /Delete_PS, Width=600
You see the resulting PNG file in the figure below.
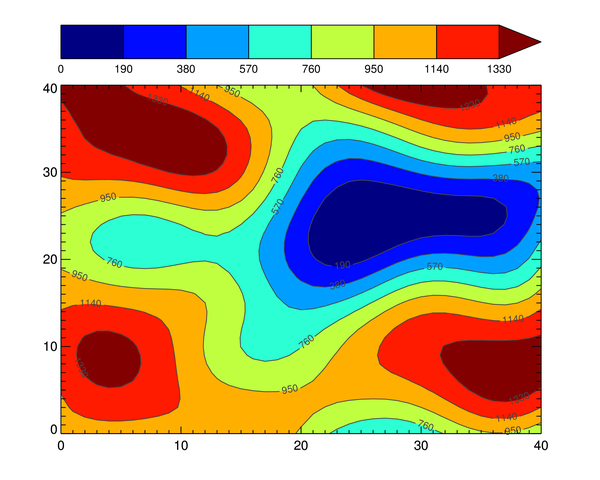 |
| Multiple Coyote Graphics commands saved as a PNG file. |
![]()
Version of IDL used to prepare this article: IDL 8.1.
![]()
![]()


