A Circular Region of Interest


QUESTION: Can you show me how to extract a circular portion of an image for further processing?
![]()
ANSWER: There are any number of ways to extract a circular portion of an image. I am going to show you a method that is simple and reasonably intuitive. The idea here is to create a circular image mask. A mask is a byte array the same size as the image, which is filled with 1s where the image “shows though” and 0s elsewhere. In our case, the 1s will form a circular pattern in the mask.
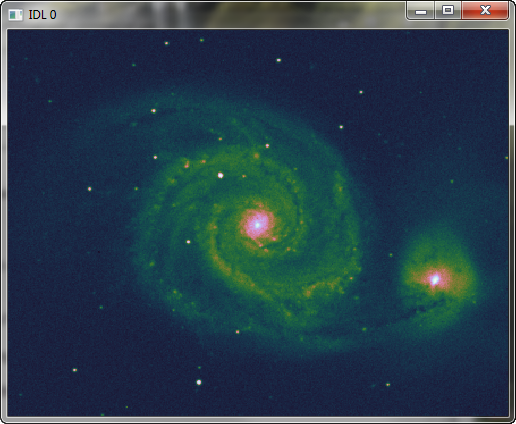
To see how this works, let's choose an astronomy image to work with. Let's suppose we are interested not in the center whirlpool galaxy, but in the smaller galaxy at the right of the image. We would like to work with pixels only from this galaxy.
   galaxy = cgDemoData(12)
   galaxy = Transpose(galaxy)
   cgDisplay, 500, 500, Aspect=galaxy
   cgLoadCT, 29, /Brewer
   cgImage, galaxy, /Save
You see the image here.
 |
| The original image. We want to work with pixels from the smaller galaxy on the right. |
To locate the approximate center of the circle I want to create, I used this command after displaying the image in the window (and setting up the data coordinate system by setting the Save keyword on the cgImage command). I clicked somewhere in the center of the galaxy on the right.
   IDL> Cursor, x, y, /Down & Print, x, y
       377.52000       119.79275
To make things easy, I'll create a circular mask that is centered at (375,120) and is 40 pixels in radius. The easiest way to create such a circle is to use the NASA Astronomy Library routine TVCircle. (This routine can also be found in the Public sub-directory of the Coyote Library, but it is best to download it directly from the source to make sure it is the latest version.)
![]()
The mask should be the same size as the image, so to create the mask we create a window of the appropriate size. I usually create a pixmap window, so nothing appears on the display. The code to do so looks like this.
   dims = Size(galaxy, /Dimensions)
   cgDisplay, dims[0], dims[1], /Free, /Pixmap
   TVCircle, 40, 375, 120, 1B, /Fill, /Device
   mask = TVRD() EQ 1B
   WDelete, !D.Window
To apply the mask and see the result, type this.
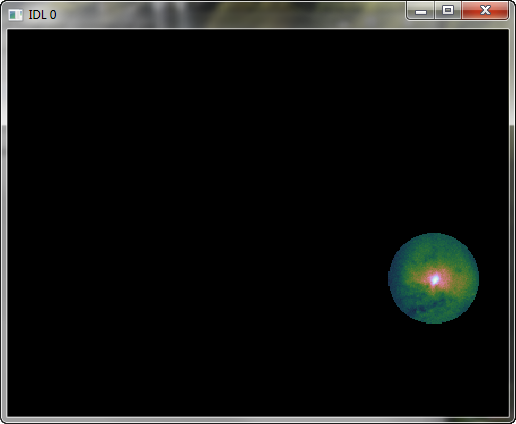
cgImage, galaxy * mask
 |
| The original image with the circular mask applied. |
Once you have the extracted image, it is easy to apply the usual techniques of blob analysis to your extracted image data.
Or, if you just want to find the boundary around this extracted region and use the boundary to create an ROI object, you can write code like this, using the Coyote Library routine, Find_Boundary.
   indices = Where(mask EQ 1)
   boundaryPts = Find_Boundary(indices, XSize=dims[0], YSize=dims[1])
   roiObj = Obj_New('IDLanROI', boundaryPts[0,*], boundaryPts[1,*])
Now you can use the methods of the IDLanROI object to work with your extracted image data.
   void = roiObj -> ComputeGeometry(AREA=area, PERIMETER=perimeter)
   Print, 'Area: ', area
     4916.0000
   Print, 'Perimeter: ', perimeter
     263.2792
Version of IDL used to prepare this article: IDL 8.2.2.
![]()
![]()


